Several months ago, I bought an IKEA mirror at the Goodwill. It looks something like the one below, except with a completely flat frame. When I bought it, it was turquoise, which although lovely, was a bit brighter than what I wanted. So I spray painted it antique gold, then lightly with a silvery champagne color and hung it up. I've been wanting to bring more silvery tones into my living room, but it just didn't look good. I liked the shape, but not the color. Also, the flat frame just looked too contemporary for my shabby chic/junk market/aspiring Miss Mustard Seed-style living room. So I left it on the wall and just felt cranky and confused whenever I looked at it :).

One day, one of my friends, Genevieve, hemmed and hawed, finally summoning up her courage to tell me: "Uh--promise you won't be offended--but I think that mirror doesn't look so good there..." We do decorating projects together and bounce ideas off each other all the time, so this wasn't completely out of the blue, but it was pretty bold of her to say.
I laughed in surprise--I wasn't at all offended, and we we brainstormed about what to do with the mirror. Then Genevieve, genius that she is, reminded me of my plan to do a table top of international money something like the penny counter I had pinned a few months ago. What about putting the money on the frame?
 |
| Source I knew this was a good plan instantly. And the rest, as they say, is history. By the way, this technique would work on any other flat surface (picture frame? small table? etc.?) you want to cover with coins. The guy at nubcakes.blogspot.com used resin and a framed counter, but I knew I didn't have the time to do a project that was quite that intense/messy/smelly/required somehow adding a lip to contain the resin all around the edge of a round mirror. |
Pretty cool-looking, right? Despite the lame pictures? I need to invest in some better equipment for taking low-light interior photographs in Washington. A light scoop? A tripod? (Gulp) a different lens? I am not exactly experiencing sun-drenched rooms this winter.
Anyway, technical difficulties and insecurities aside, here is the tutorial:
Other than a surface to decorate (flat mirror frame? picture frame? etc.?), you'll need:

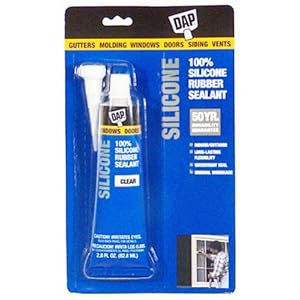
- Silicone adhesive (I used Dap Clear Silicone Rubber Sealant)

- Modgepodge Hard Coat
- Foam brush
- Lots and lots of coins (more than you think you'll need--I was literally raiding my kids' piggy banks--I did pay them back, don't worry...)
Step 2. After you have it all arranged to your satisfaction, start using the adhesive to stick the coins on. You might experiment with how much sealant you need. I found about a pea-sized dollop was about right for a dime--more for larger coins. Do all the coins. It took me about two hours to do all of mine spaced out over a day or so.
Step 3. When you think you are done, pick up your frame and turn it upright. If you are like me, a few coins will fall down because you forgot to glue them. Better to find this out later than never.


Step 4b. Let the first coat dry completely. Then add two more coats, letting them dry thoroughly between coats. Voila! You will be done and have a unique, valuable (har har) home accessory to be proud of.
A few braggy pictures:

Ooooooooo!

Ahhhhhhhhhhh!
Let me know if you try this technique. I'd love to hear how your project turns out!

I'm linking up to:


