


I'm really not naturally crafty, but my sweet mom did teach me to sew. If you are like me and have done a fair amount of sewing, a project like this is a snap. However, it is totally doable even if you are a novice.
I got the idea from Betz White's blog. I followed her directions fairly closely, but I customized the apron length depending on the wearer and the length of the pillowcase. Her directions make an apron that is a tad short for my taste when you are using a standard size pillowcase and sewing for an adult--it is more of a toolbelt style apron. More on this below.
Here are some pictures of the two I made initially. They are really cute on, no matter whether you are are a lithe and cute 8-year-old, or a 30-something-year-old with a little more fluff under your pillowcase, if you know what I mean...

Here is what you need:
- 1 pillowcase
- Grossgrain ribbon--approximately 2 yards of 3/4 to 11/2 inch wide grossgrain ribbon (normal, not the wired/decorator type)
- Thread--match the ribbon or the pillowcase or both?? your call...
I sewed three more aprons after these initial two as birthday gifts for some of my "London" friends. They are a great group of girls who I met while all our husbands were working on a project in London, England. We started a book group over there, and have been meeting regularly ever since (until I moved to Washington, that is...sigh). So ladies, if you are reading this, try to act surprised, 'k?
A note on cost--these aprons are averaging maybe $3 each. I got the pillowcases because they were adorable, affordable ($1 a piece) and brand-new at the Goodwill. If you used pillowcases from Target or wherever, that would obviously drive up the cost. And as for this ribbon, the patterned ones came from Jo-Ann's ($3.99 a spool, and I didn't use all of it). The solid ribbons come from spools of ribbon I got about five years ago that were $1 for 500 yards.
Yes--one doll-ah.
At the risk of making this the tutorial with the longest introduction ever, I must digress and eulogize the old dollar store in Sandy, UT. Before it became a Dollar Tree, it was a Greenbacks All-A-Dollar. Greenbacks would sometimes get some completely awesome stuff (like 500 yards of real grossgrain and satin ribbon for a dollar). I bought about $10 worth. In retrospect, I should have bought a whole carful--but I am enjoying the colors I did buy while they last.
 |
| My bargain ribbon and pillowcases. |
1. So, you get your pillowcase and fold it in half length-wise (pic 1).
 |
| Pic. 1. Please ignore the fact that I've already pinned other stuff on this apron. I forgot to take the picture :). |
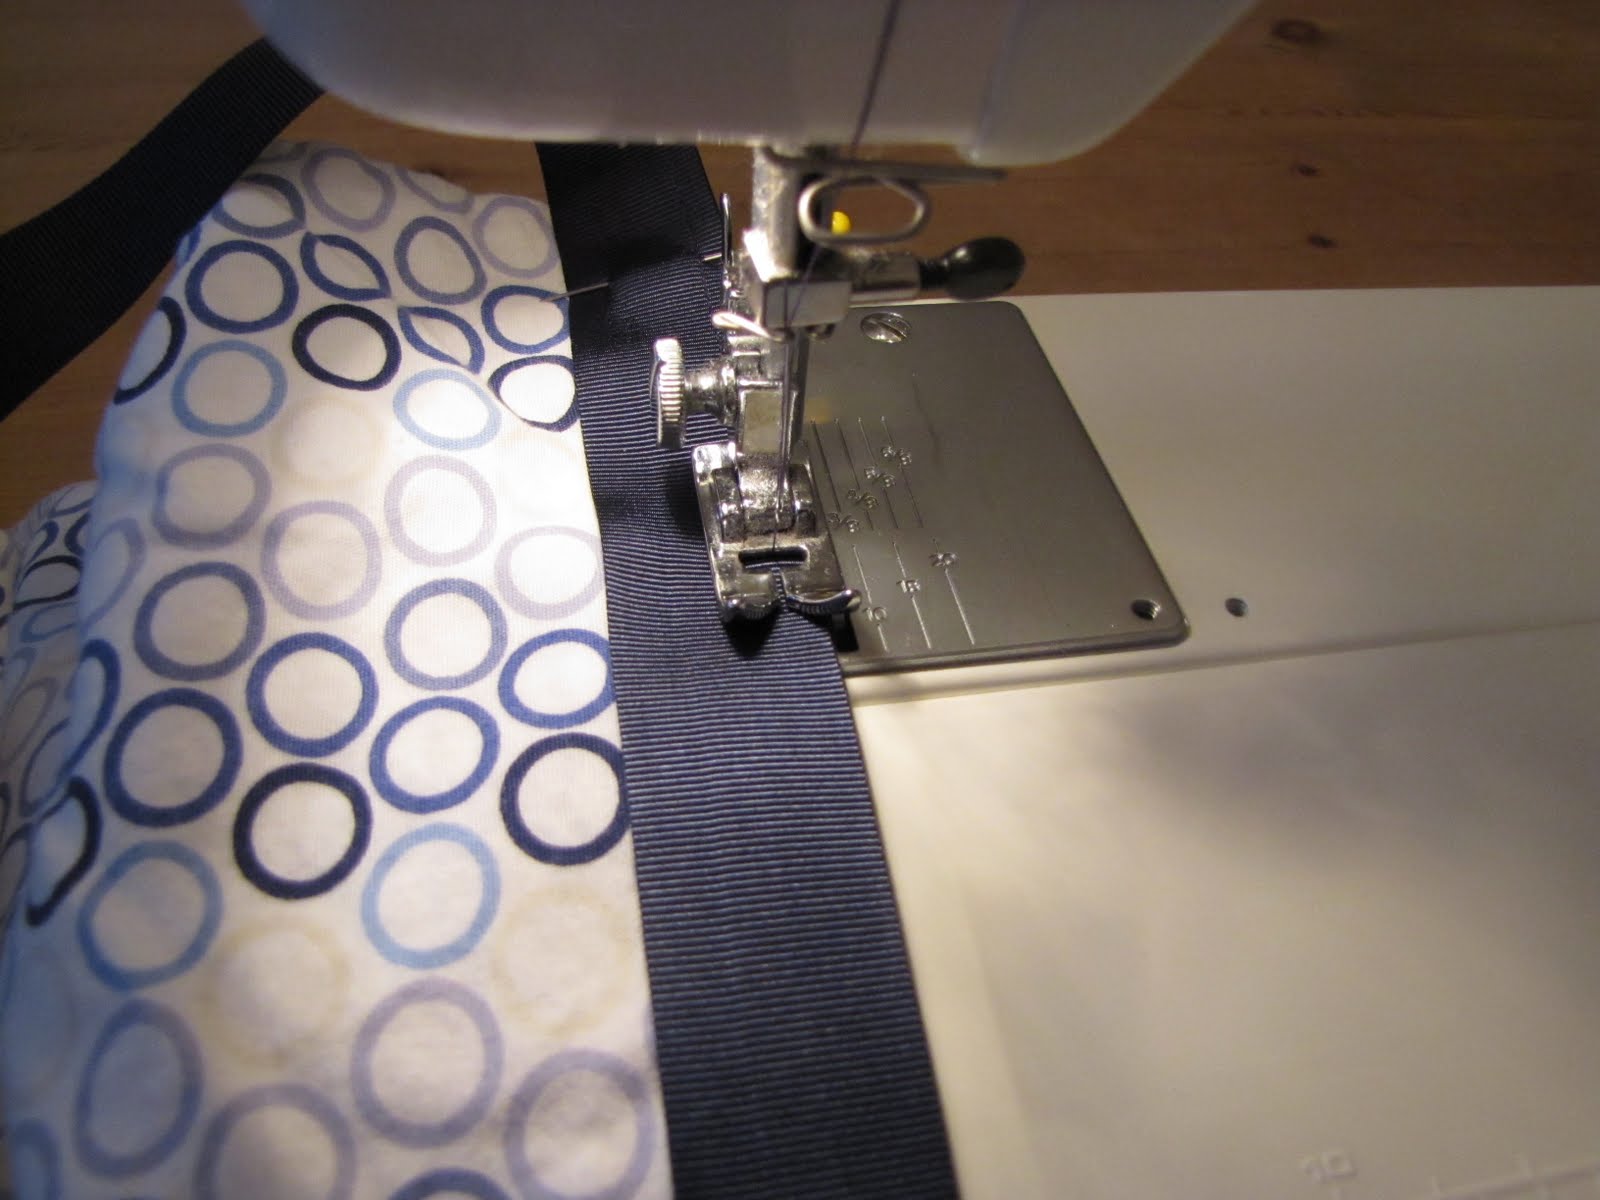
2. Fold your ribbon in half (pic 2), line up your centers (pic 3) and pin your ribbon on the top, unhemmed edge (the "bottom" of the pillowcase--see pic. 3).
 |
| Pic. 2 |
 |
| Pic. 3 |
 |
| Pic. 4 |
 |
| Pic. 5 |
 |
| Pic. 6 |
 |
| Pic. 7a |
Or, you can do a wide zig-zag down the middle of the ribbon--just make sure to go forward/reverse a couple times at each end to ensure it will be durable.
4. Now, if you have a long, king sized pillowcase, or if you have a standard-sized pillowcase but like your apron short (or if you are making this for a child): fold the bottom/hemmed edge up 8"-9" and hem the fold 1/4" from the edge.
 |
| Pic. 8 |
 |
| Pic. 9. Hemming folded edge 1/4 inch from edge. |
5. Then fold apron over again (about 8"-9")--see Pic. 10 of what the folded apron looks like from the side. Pin the sides. Sew 1/4" from each side, then sew down the middle (for a divided pocket)--see Pic. 11, then sew 1/4" from the bottom fold/hem. Look at the finished aprons at the top if you need a visual in terms of where the edges need to be sewn.
 | |||||
| Pic. 10. View of folded apron from the side. |
 |
| Pic. 11. Center pocket pinned and being sewed. |


Clip your threads if you haven't already done so, and you are done.

Oh yeah!
But in the meantime, I need to get these to the post office for my friends, and who am I kidding--take a shower and keep packing :). Later!
I'm linking up to: Not Just a Housewife's Show me What Ya Got and


Super cute! I love the blue one. And I don't see any "fluff" at all! ;)
ReplyDeleteYour 'fluff'comment made me laugh and laugh...and I'm still smiling now!! What a funny phrase.....and what a greeeeeat idea these are! They do look super-cute on both of you! I really like them.
ReplyDeleteSarahx
You did a great job! Nice tutorial too. :) I love aprons!
ReplyDeleteThanks for joining my Weekend Bloggy Reading party. Hope you'll stop by Serenity Now again soon! :)